Make 3D Christmas Tree Cookies!


Fun and Festive Cookie Sculptures!
Christmas cookies are one of my favorite parts of Christmas, and this year I decided to make a 3D Christmas tree out of stacked cookies!
This is such a fun and easy project and the finished result is gorgeous. There are a few different ways you can use the cookie sculptures, but, I have to admit, my favorite is to eat them!
To Get You Started - A Few Things You'll Need.


Make the Cookies
Ingredients:
1 bag or box of sugar cookie mix (I used Betty Crocker)
1 1/4 cups confectioners sugar, separated
2 to 4 teaspoons milk, separated
2 teaspoons light corn syrup
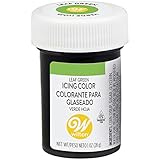
Green food coloring
Yellow food coloring
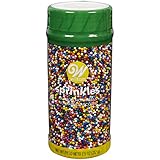
Rainbow nonpareil sprinkles
White sparkling sugar
Mix the cookie dough according to the package directions for rolled or cut-out cookies. You can adjust the sizes of the individual cookies if you like, but to make a large and small one like I did, you'll need a four-piece set of nesting star-shaped cookie cutters. Roll out the dough to about a 1/4 of an inch and cut out 3 of the largest stars, 5 of the medium star, 5 of the second smallest star, and 7 of the tiniest star. (It breaks down like this: 3 cookies of each of the four sizes plus one extra of the smallest for the large tree, and then 2 cookies of each of the three smallest sizes plus one extra of the smallest for the small tree.) You'll have some dough left over, so you could cut out some extra stars for another small tree or just make some extra cookies to eat! I suggest using a metal spatula to lift the cookies onto the baking pan and lining the pan with parchment paper, since it's easy to break the stars. Bake according to package directions and cool completely.
Make the poured cookie icing by sifting 1 cup of confectioners sugar and stirring in 2 teaspoons milk and 2 teaspoons corn syrup. (I stir it together with a fork.) You want it pour-able but not too thin and drippy, but you can add a tiny bit more milk if it seems too thick. Spoon a generous tablespoon into a separate cup and tint that yellow. Then stir some green food coloring, preferably gel food coloring, into the larger batch until you reach your desired color. Spoon the green icing into a baggy, and snip a small hole in a corner of the baggy.
Lay out the cookies on parchment paper or plastic wrap. Set aside two of the smallest stars. Drizzle the green icing on the cookies, starting in the middle and going out towards the star tips to make it look more like branches and leaves. If you'd prefer a solid coating of the icing instead, make a double batch so that you can outline the star shape and then fill that in for a smoother finish. Do only a few cookies at a time, and then generously sprinkle on the rainbow nonpareils.
On two of the smallest stars, drizzle the yellow icing. I just used a small spoon to do this. Put a dollop in the center and slowly push it into the corners. Generously sprinkle them with the sparkling white sugar (or white or silver sprinkles). Let the icing dry completely, overnight is best. Then, flip over the two yellow cookies and ice and sprinkle the back the same way you did the front if you want them to stand up on the tree. If you're going to lay them flat, you don't need to do the back. Let this dry.
The Finished Tree

These Christmas Tree Sculptures are so much fun! Smaller ones make a great addition to your Gingerbread House displays. You can even pipe small dabs of thicker white icing to resemble snow. Scroll down for more great ideas!
Once the icing is dry, remove the cookies from the parchment paper. I suggest using a metal spatula because if there's too much icing sticking to the paper, you could break the ends off the cookies. Very gently break off any huge chunks of icing. Make an icing glue with a 1/4 cup of confectioner's sugar and 1 to 2 teaspoons of milk, and then color it green to match. (Or if you have leftover green icing from decorating the cookies, you could just use that.) Put a small dollop of the icing "glue" in the center of the bottom cookie and place a cookie on top of it, repeating all the way up, and going from the largest cookies at the bottom to the smallest at the top. Look at the sculpture from the top to make sure it's not leaning in any direction, and stagger the way the star tips are facing.
To make the large tree, use three of each of the four cookie sizes, starting with the largest on the bottom, for a total of 12 green cookies. For the small tree, use two each of the three smallest sized cookies, for a total of 6 green cookies. For trees with a flat star, just attach the yellow cookie the same way you attached all the others. For trees with a standing star, use a sharp knife to cut off the bottom of two of the star tips, cutting both at the same time for a level bottom. Then, using a spoonful of green icing "glue," dip the flat star tips in the icing, making sure they're covered, and attach it to the tree. Hold it for about a minute, then gently add a little extra green icing to the front and back of it, so that it gets underneath the star and the star will stay put, and sprinkle a few more nonpareils on the new green icing. If you like, you could try piping a bit of thick white icing on the ends of the branches to resemble snow, but otherwise, you're done! Enjoy!
Standing Star vs. Flat Star

How to Use Tree Sculptures
1. Use one as a centerpiece on a small table or dessert table, or make a forest of different-sized trees to use as a centerpiece on a larger table or dinner table. Surround them with shredded coconut for "snow" and foil-wrapped candy for "presents."
2. Make small trees with a flat star on top to put in the middle of cookie platters that you're giving away to friends and family.
3. On small or medium trees, write the names of your dinner guests on the stars with white icing and mark their seat at the dinner table by placing the tree on top of the plate setting.
4. And the best part - eat them!
A Few More Products That Will Help You Out


NEW! Try Wilton's Cookie Cutters Made Just for Stacked Cookie Trees!

In a hurry? Instead of spending two days making the cookies, assemble the trees just after icing them. The icing may get a little smooshed, but it should just add to the tree-like texture.
And if you don't want to ice both sides of the star cookies, but still want a sparkling tree-topper, you could instead just flatten a couple of yellow gum drops and use a knife to cut in into a star shape. Attach it with the green icing.


